Tuesday, August 6, 2013

Iron Man-inspired Makeup Look

Hey, everyone! :) This is my Iron Man-inspired makeup look for my The Avengers series. I did my best to incorporate all the elements and colors of Iron Man's costume. I also used products that are available here in the Philippines. And I did Iron Man first because.......well, he's awesome! I mean, who doesn't like Iron Man?!


TUTORIAL COMING UP!!! :)

Makeup Tip Tuesday: Mascara FAIL Quick Fix


No. Just. NO.
You are applying your makeup and you are done doing your foundation and your eye shadow. You admire yourself for doing such a good job with your eyes and face. Now you apply mascara like you normally would. After that, you see a huge black spot either on your nose or your cheek. You get a cotton bud and erase it, but you only made it worse by smudging it more. Right then, when you blinked/closed your eyes, mascara marks are now all over your under-eye area! So, you get your concealer and dabbed it on, but it still won't totally hide it and ruined your flawless foundation application! Therefore, you curse the mascara gods and question why mascara application can be so messy. (Who can relate to this? I can. Haha!) Cleaning up mascara mishaps can be a pain. So today, I'll give you a quick fix for this kind of accident. 


It's important to wait for the mascara smear to dry before you try taking it out. When you clean it up when it's wet, it would tend to spread and smudge more. By drying it first, the mascara will harden and flake, making it easier to remove by using a cotton bud. You can use one that's dry or dipped in moisturizer/makeup remover. Whatever works for you! :)

Monday, August 5, 2013

Eyebrows 101: Choosing Your Brow Color

Your eyebrow color can help change your look. Of course, your choice will depend on different factors: personal preference, age, skin color, hair color, occasion, etc. When you choose an eyebrow color, you have to pick one that would be best for you. Here are some tips on choosing the perfect shade for your brows:


1.  If you have dark hair, you should go 2-3 shades lighter than your hair color.
2.  If you have light hair, you should go 2-3 shades darker than your hair color.
3.  If you are blonde, don't go for blonde brows! It will only wash out your face and it won't really help sculpt your face. Instead, go for a soft taupe shade.
4.  For a more 'edgy' look, you can always go for a darker shade.
5.  When you think you put on a color that's too dark, it can be remedied by applying brow mascara in a lighter or blonde shade.
6.  It is best to use an angled eyebrow brush when applying eyebrow powders/gels.
7.  For softer-looking eyebrows, use gentle feathery strokes rather than harsh straight lines. The strokes will mimic the hairs on your eyebrows, therefore creating a more natural look.
8.  If you keep changing your hair color, get a universally flattering TAUPE color. :) I feel that taupe shades can fit a lot of hair colors and skin tones. (BTW, taupe is a grayish brown or brownish gray color. It depends on the shade.)

*Note that these tips might not work for everyone. These are just some of the rules that you can keep in mind in choosing the right eyebrow shade. 


So how about you? What eyebrow color do you use? Do you use pencils or powders? Feel free to comment below! :)

Thursday, August 1, 2013

EYEBROWS 101: FILLING IN YOUR BROWS

I rarely go outside without filling in my eyebrows. For me, it just doesn't feel right! I tend to be O.C. when it comes to my eyebrows and I feel that it just has to look perfect. I really take my time in filling in eyebrows and I guess it's my most favorite in doing makeup. For months, I have been experimenting with ways I can fill in my brows using different products. In this quick tutorial, I'll use three eyebrow products and some other tools that may come in handy. Note that this method is not the only method for filling in brows. You can skip steps if you want because we all have different eyebrows and preferences.


TOOLS:
1.  Spoolie or eyebrow brush
2.  Tweezer
3.  Angled eyebrow brush
4.  Cotton buds

PRODUCTS I USED:
1. Ever Bilena Advance Perfect Eyebrow pencil in Medium Brown
2. in2it waterproof eyebrow powder
3. Billion Dollar Brows brow tint in Blonde
4. The Balm cream concealer in Light/Medium

Now, let's get started! :)


Stay tuned for the next post--how to pick the right eyebrow color! :>

Other Eyebrows 101 post: SHAPING YOUR BROWS

Wednesday, July 31, 2013

Eyebrows 101: How to Shape Your Brows


Eyebrows are the new emphasis of the face. In magazines nowadays, photoshoots, ads and television, the trend right now is beautifully shaped, full and defined eyebrows. Your eyebrows can frame your eyes just like your hair can frame your face.  Hence, it is important that you know how to groom and fill in your brows to make your face lifted. Today, I'll teach you some of my eyebrow tips. :)

1. DON'T OVER-PLUCK. - Please put down that tweezer after you have plucked the stray hairs off your eyebrows! There is nothing pretty about over-tweezed brows.

2.  FAKE IT WITH CONCEALER. - If you can't go to the threading/waxing salon because of some reason, and you can't stand going somewhere without having perfect brows, go ahead and dab concealer on parts with stray hairs!

3. KNOW YOUR FACE SHAPE. - Your face shape will determine the shape of your brows. Like if you have a round face, your eyebrows should have a higher "arch" to make it look slimmer. And if you have sharper features and angles, you can probably lower or soften your eyebrow arch.

4. SYMMETRY IS IMPORTANT. - Of course, you'd want your eyebrows to look alike. But remember this: "Your eyebrows should look like sisters, not twins."--some old eyebrow proverb

5. PRACTICE. - With practice, you can do anything better. You can practice using different tools and products that would suit your eyebrows. Start with eyebrow pencils, powders and gels--whatever works for your unique brow shape!

Here's a quick tutorial on how to shape your brows:


THINGS TO REMEMBER:
*Keep in mind that there are different eyebrow shapes. There is no one specific brow shape for all of us! In the end, it all boils down to personal preference for the look that you are going for.
*Symmetrical brows do not exist. Makeup and grooming just creates the illusion of having them.
*If you are having a hard time shaping and filling in your brows...you can even buy eyebrow stencils to make your life easier! :)


Below is a guide to understanding which brow shape is best for each face shape:
*Image is from the Moonberry Blog

Let's face it, your brows can make or break your entire look. Choosing the right shape can also be flattering and can help create the illusion of a slimmer face. Always remember these tips and just have fun with it. Watch out for my next blog post because it will be about how to fill in eyebrows. Can't wait to post it! >_<

Monday, July 29, 2013

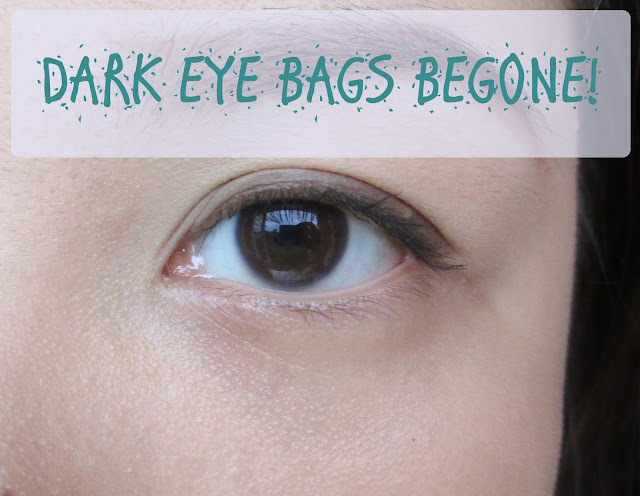
Makeup Tip Tuesday: Dark Eye Bags Begone!


Most of us are dealing with dark under-eye circles--maybe because of stress, lack of sleep or just genes. And because of this, we may even look older than our real age. People have asked me how to properly conceal the dark circles under their eyes so they will look less tired and more refreshed. Some of them have claimed that even when they put concealer, their eye bags do change color (from dark to light), but would stand out more (look puffy), rather than be hidden. My answer to this is simple. Apply your concealer in a triangular form! :)

I CALL IT THE YOUTH TRIANGLE TRICK.

Now wait, what? Youth triangles? What are those? Let me explain. The youth triangles of your face are these:

See those two triangles? Those are the areas of the face that we'd like to highlight to look young and fresh. And I swear, by applying this technique, you'll have an instant face lift in no time! :) Here's how we do it:


Get a liquid/creamy concealer (1 or 2 shades lighter than your skin tone) and apply it from your lower lash line downwards. Continue applying it outwards until you read the outer corner part of your eye.
Blend with your ring finger using a patting/rolling motion (or a sponge if you prefer) and you get this! See the difference between the left and right side?
Now, let's compare this technique to the way we usually apply concealer.
Dot the concealer on your dark circles/eye bags and then blend with your ring finger.


And you get this. Look how the left side of my face sags than the right side!

The youth triangle technique does wonders to your face in minutes! I promise, if this trick is done correctly, your face will be more lifted and appear more glowing and well-rested. Now pack your bags (pun intended), do yourself a favor and give yourself an instant face lift! :)

Technique was done on the right side. I love how that side of my face seems more lifted as opposed to the left side, which appears more tired and baggy.


Beauty Smackdown: Urban Decay Primer Potion vs e.l.f. Eyelid Primer

I have hooded eyelids. Hooded eyelids are eyelids without the usual visible "crease" on standard eyes. When you look straight to a mirror and you don't see your eyelids, it means you have hooded eyes. It frustrates me at times because when I apply eye makeup, and open my eyes, it's as if I didn't apply any eye shadow at all! Plus, when I wear eye shadow, my lids tend to get oilier as the day progresses which results to a lot of creasing or oil bundling up on the folds of my eyes. And that's not a pretty site! Good thing makeup companies have thought of a solution...eye shadow primers!


Eye shadow primers are what you put on your eyelids prior to eye shadow application. It helps your eye shadow to stay put the entire day, prevents creasing by controlling oil and makes the color of the eye shadows more intense. So here I am with a Beauty Smackdown for two eye shadow primers: 
Urban Decay Primer Potion VS e.l.f. Mineral Eyelid Primer

Let's find out which eye shadow primer is better!

Contestant #1 - Urban Decay Primer Potion in Original
Stats: 
-  Urban Decay is not available in the Philippines :(
-  Priced at Php900-1200 in most online shops
-  Urban Decay describes the product as "coveted by makeup artists and makeup junkies alike because it guarantees more vibrant eye shadow that lasts for 24 hours and NEVER CREASES!"
-  contains 11ml of product and comes in a squeeze tube

YAYS:
- The packaging!  With this tube packaging, you'll definitely get more bang for your buck! Before, it used to be a "potion" type and has a bent doe foot applicator (which was unhygienic btw), but you wouldn't really get all of the product out!
- Packaging is more hygienic. Makeup artists can definitely use this product!
- It does what it says! Minimal to no creasing even after 8hrs and the eye shadows stay put no matter what. 
- When used, eye shadows have increased color intensity, compared to when using no primers. 
- It absorbs into your skin fast and appears invisible once set.
- It has no smell.

NAYS:
- It is quite sticky, which could cause your eye shadow application to be uneven. You have to use a light hand to blend.
-  It is so expensive.
-  It contains parabens.
-  It is unavailable in our country.

Smart packaging right here!


Dries to an invisible finish


Contestant #2 - E.L.F. Mineral Eyelid Primer
Stats:
-  Available at elf counters in SM dept stores and other drug stores
-  Costs Php 129.75
-  The Eyes Lips Face website describes that this product preps your lids for smoother, long-lasting and crease-proof eye shadow.

YAYS:
-  It is true to its claim--eye shadow lasts longer, no creasing and makes eye shadow application smoother and easier.
-  The product is readily available in several e.l.f. counters.
-  It is so cheap! :) Php 129.75 is a pretty fair price to pay for a product so effective such as this.
- It is not a sticky base. It dries into a smooth powder-like finish, which helps in applying eye shadow easily.
-  It also has no smell.
-  It is mineral based so I feel that this is good for your skin.

NAYS:
-  I don't like the packaging of this product. It comes in a tube with a sponge-tip applicator. You wouldn't get all the product out of the tube with this kind of packaging. I guess it's okay if it's for personal use only, but for MUAs it's something to consider. At the neck of the tube, there's a bit of drying of the product, because of the wand applicator which pumps air in and out.
-  Since the product is not a sticky base, eye shadows don't easily "cling" to it. It doesn't have the intensifying color effect compared to the UDPP. But this can be remedied by using high quality/highly pigmented eye shadows instead.

elf Eyelid Primer! It doesn't say how much product is inside though.

Comes with a straight sponge tip wand applicator
It has a very sheer finish.
Some of the product dried up on the neck of the plastic tube.

I applied the UDPP and the elf primer on my arm, and in between there's no primer whatsoever. I swatched an eye shadow twice on each of these.

And the winner is.................. the e.l.f. Eyelid Primer!

I think both of these products are great at making your eye shadow crease-proof and last all day. The main difference between them is that the elf one does not "grab" eye shadows the same way as the UDPP does, because it is not sticky. I think this makes the elf product more user-friendly especially for beginners in eye shadow application. Although the Urban Decay primer really helps enhance the color pay off of your eyeshadows, I feel that it is recommended for experienced users or for MUAs who know how to work with this product. Also, the elf primer has a milder formulation since it is mineral-based, as compared to the UDPP which has a different formulation and contains parabens. But what really tipped over the two was the price. Elf clearly won this round because not only was it effective, but it is also budget-friendly and readily available in the Philippines. YAY for the elf eyelid primer! :)